
How to Make a Knife Handle
In this article we describe how to put a knife handle on a knife tang. This includes preparing the handle scale, drilling and cutting the scale, then finishing off with pinning glueing and shaping.
STEP 1. PREPARATION
In this example we glued several pieces of wood and synthetic together to make the scales. Trim the scales on a belt grinder to ensure it is an even thickness throughout. Our scales vary between 6mm and 10mm – 7-8mm being the ideal thickness.

STEP 2. CHECKS AND MARKING
Determine the side you want to face outward and be visible when finished, this is usually the nicest part of the grain. Ensure the other side of the scale is perfectly flat, you can use the edge of a steel rule to check this. Use a pencil to mark the inside and outside of the scale. Do the same to the other scale.
STEP 3. POSITIONING
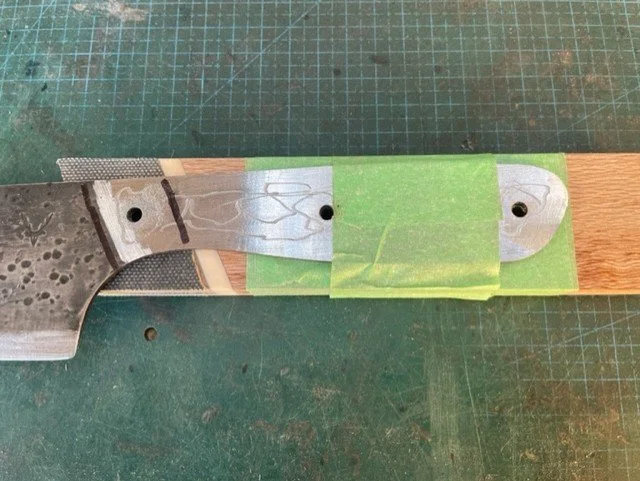
Orientate the scales correctly (exactly how you want them to sit on the knife) and tape them together with painters tape. Lay the knife blank on top of the scales in the position you desire. In this example we have a slightly more challenging angle pattern that needs to line up with the knife scale. Secure the knife blank with more painters tape.

STEP 4. DRILLING
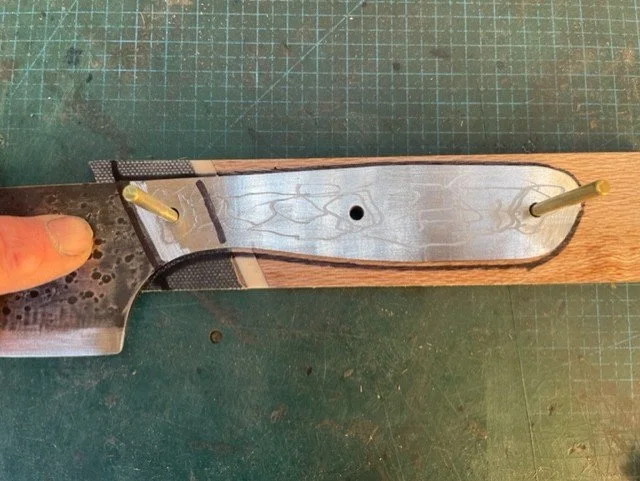
Drill the first hole through the knife scale and into both blanks. Insert a pin that is slightly smaller than the hole that you have just drilled, then drill the second hole. Insert another pin into the second hole that you have just drilled and drill the third hole.


STEP 5. MARKING & CUTTING
Remove the tape and separate the blanks. Reinsert the pins on one scale and on the outside of the scale, draw around the knife blank to mark the handle position. Repeat this on the other blank. Remove the pins and set the blanks aside for cutting. Cut out the shape of the handle on both blanks using a bandsaw or fret saw.


STEP 6. MATCH THE FACES
This Is an important step, and it is easy to forget to do it. Orientate the scales correctly and put two pins through two of the holes. Use the belt grinder to shape the front faces of the scales. Start with a course grit and finish with a fine grit. The faces of these scales will be very difficult to sand once the handle has been assembled so it is important to ensure they are finely sanded, and they match each other.

STEP 7. SCORE THE INNER SURFACES
Use a Dremel to score the inner sides of the knife scales and the knife blank. This will help achieve a stronger bond when glueing.

STEP 8: PREPARE THE PINS
Cut the pins to the correct length (approx. 25mm or 1 inch depending on the knife) and use the belt grinder with a fine grit to make the pins slightly smaller than the holes and to chamfer the edges. This can be fiddly and is easier to sand a larger length of pin material prior to cutting the pins. If it is your first time doing this, you can also ream out the inside of the knife scale holes a fraction and chamfer the pin holes on the inside of each knife blank. This will ensure the pins will slip into place with no obstructions when glueing.


STEP 9. GLUEING
Ensure you lay out everything you need prior to glueing. You will need epoxy, isopropyl alcohol, acetone, paper towels or cloths, clamps, a small hammer, and latex gloves. Start by cleaning the knife scale, the knife blanks and the pins with isopropyl alcohol. Mix the epoxy thoroughly and coat the inside of one of the scales. Coat the pins in epoxy and insert them into the knife blank holes. Coat both sides of the knife scale and drop it over the pins. Coat the top of the pins with epoxy and the inside of the second scale. Gently tap the scale onto the pins (you may need to use a small hammer) until the scale is seated. Clamp the middle of the handle, then the front and the rear. Wipe away excess epoxy with a paper towel or cloth and use acetone to remove any epoxy that has ended up on the blade. Acetone is very good at removing epoxy so ensure the knife is held upside down when removing epoxy on the blade near the handle or on the facing side of the handle. You do not want acetone running underneath the handle. Place the knife in a warm area to harden and dry.


STEP 10. SHAPING THE HANDLE
It is easiest to use a belt grinder with a very course grit to do most of the shaping. Before you get started, determine the overall width of the handle and calculate the finished width of each handle scale. In the example shown the overall width of the handle is 14.5mm – the knife scale is 2.5mm thick and each handle scale is 6mm. Once you have determined the finished width of each scale, use a vernier/calipers to ensure the correct thickness top and bottom. Move to finer belt grits to smooth the handle as you go and use a Dremel finish the curves and to make sure everything is proportional. Finish off with fine sandpaper and polish till smooth.
